Well, this pretty much sums up our weekend:
 It’s really too bad that our pups lead such a tough, miserable existence! Clearly they don’t get to have any fun at all.
I’m noticing a new trend popping up on a lot of design blogs recently – furniture made from reclaimed shipping pallets. Ever since I spotted this funky green coffee table for my Retro Glam mood board, I’ve become slightly obsessed with finding new ways to upcycle pallets into functional pieces for the home.
Wooden pallets are pretty easy to find. Often warehouses and hardware stores have an abundance that they are more than happy to give away or sell inexpensively. However, some shipping pallets are treated with toxic chemicals or may contain harmful bacteria, so its helpful to educate yourself first so you’ll know which ones to steer clear of and which types are safe. Once you’ve found good and sturdy pallets, the possibilities are endless!
clockwise from top: Pallet Shelving, Pallet Outdoor Dining Table,
White Pallet Coffee Table, Pallet Dining Table, Glass-top Pallet Coffee Table,
Pallet Console Table
clockwise from top: White Pallet Daybed, Pallet Loft Furniture,
Nursery Pallet Reading Bed, Low Pallet Seating Bench,
Pallet Wall, Pallet Kitchen Shelves, Decorative Pallet Shelving,
Pallet Headboard Wall, Pallet Headboard
clockwise from top: Pallet Potting Bench, Pallet Lounge Chair,
Rustic Pallet Planter, Pallet Garden, Pallet Refuge,
Pallet Swing Chair, Pallet Shaded Retreat, Pallet Picnic Table
Basically you could decorate an entire house, inside and out, with recycled pallets! I’m especially fond of the coffee tables, though, because I’m a total sucker for any piece of furniture with caster wheels. Now I just need to hunt down some pallets!
My parents built a beautiful new home in San Antonio a few years ago and have done a fabulous job decorating it. Mom is extremely creative and every time we visit I love walking through the house admiring the new things she has done since we were last there. I get most of my good design ideas from her!
There is one room, however, that Mom has never been happy with – the upstairs living area. The layout is a challenge because it’s a long, narrow space that needs to serve several functions including TV-watching, reading, exercising, and a place to spread out and work on projects. Mom sold most of the family room furniture in a recent garage sale so she could redecorate and requested my help developing a plan for the space. Fortunately, she provided a few guidelines and photos for inspiration.
Mom’s Family Room Wish List:
- Add small pops of color in throw pillows and art work.
- Mount flat screen TV on the wall.
- Incorporate textures that will add visual interest.
- Utilize the existing game table, chairs and floor lamp, if possible.
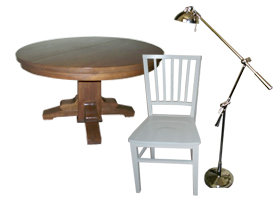
Since we are both visual thinkers, I decided to compile a few different mood boards to get the creative juices flowing. The new elements we add to the space need to complement the existing furniture in the room, which should be relatively easy since they are such classic, neutral pieces.
clockwise from top: Custom Color Palette, Framed Graphic Prints,
Nelson Bubble Lamps, Ambre Sofa, Duncan Cube Ottoman, Mrs. Godfrey Chair,
Zig Zag Jaipuri Rug, Mid-Century Modern Credenza, Vidrio Glass Table Lamp,
Chinoiserie Long Pillow, Lime Trellis Pillow, Maddox Teal Pillow
The first proposal blends Mid-Century Modern finds with a bright, airy color palette to keep the space feeling fresh and contemporary. Maybe we can score a good deal on a vintage-looking credenza if we keep our eyes peeled on Craigslist. Mom already has several Pottery Barn frames tucked away in a closet that could be filled with a variety of colorful, graphic prints and hung in a cluster like the inspiration photo above.
clockwise from top: Rich Elegance Color Palette, Bookshelves, Chevron Pillow, Kuba Cloth Pillow, Corallum Coral Pillow, Oatmeal Grasscloth Wallpaper,
Melesse Table Lamp, Paloma Sideboard, All Square Flor Tile Rug,
Eames Lounge Chair, Capiz Shell Floral Pendant Light, Austin Ottoman,
Campbell Sofa, Sunburst Mirror
A rich, earthy color palette gives warmth to the space in this design option. Grasscloth wallpaper would add texture and visual interest to the focal wall. Built-in bookshelves would provide storage and give the room a cozy, lived-in feel. I can just imagine kicking back with a cocktail and a good book in that sweet Eames lounge chair!
clockwise from top: Custom Color Palette, Colorful Bookshelves,
Teal Mongolian Wool Pillow, Bargello Chevron Pillow, If…Then Pillow,
Capri Bottle Lamp, Trollsta Sideboard, Zebra Hide Rug, DIY Pallet Coffee Table,
Copenhagen Chair, Hayes Sofa, Abstract Painting, DIY Yarn Pendant
Honestly, I just threw this mood board in as a wild card, but I think the colors are so fun for a casual family room. The zebra rug and bright accessories pack a powerful punch! I love the color contrast in the inspiration photo where the back of the bookshelves are painted bright blue and the walls are lime green. The do-it-yourself wood pallet coffee table and yarn pendant lamp are not only easy on the wallet, but they would be great conversation pieces, too.
So, what do you think? Which option would you choose?
One of the things I miss about living in a big city are the abundant shopping options. Tulsa isn’t exactly the end of the Earth, but the choices here are much more limited than what I’d grown accustomed to while living in Austin. For instance, there is not a single Container Store in the entire state of Oklahoma – no one-stop-shop with aisle after aisle of clever products to solve every organizational challenge under the sun. What is an Okie to do?!
Well, I’ve learned that with a little creativity and resourcefulness, you can give Container Store a run for its money. There are plenty of simple storage solutions that can be made from recycled materials and other common household objects. Here are a few of my favorites:
clockwise from top: Soup Can Storage, Baby Food Jar Storage,
Pringles Can Organizer, PVC Curling Iron Holster, Cereal Box Magazine File
clockwise from top: Toilet Paper Roll Cord Container, Bread Tag Cable Labels,
Flip Flop Hangers, Sheet Sets In a Pillowcase,
Paint Stick Drawer Organizer, Branch Jewelry Organizer
Not only is it entertaining to shop your own recycle bin for potential storage solutions, but you will save alotta moola in the process. For those of you still playing along at home:
Organizing, recycling, and saving money at the same time – now that’s what I call multitasking, people!
Y’all. I just cut my hair for the first time in a year!
Last summer my sweet mother-in-law lost her hair as a result of chemotherapy. I told her that I wanted to grow mine out, and that I would make a donation to Locks of Love in her honor. In order to donate, your hair needs to be at least 10 inches in a ponytail. Finally, after many months of trying to tame these thick, tangled tresses, today I felt ready to chop it all off!
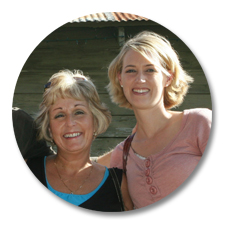
My stylist cut 12 inches, to be exact!!! And, man, it sure feels good. Sometimes you just need to make a dramatic change to spice things up a bit!
I hoped to share this day with Brenda, but I have no doubt she’s giggling with excitement in heaven and celebrating that a very deserving child will get a new wig. I’m pretty certain that this is exactly what she would have wanted for Mother’s Day!
For Earth Day this year, Anthropologie created an entire theme around recycled wine corks and even hosted a “Crafting with Cork” day in many of their stores. After receiving the invite, I immediately called to reserve my spot at the event and was asked how many children I would be bringing with me. “Ummm…..ZERO?!”
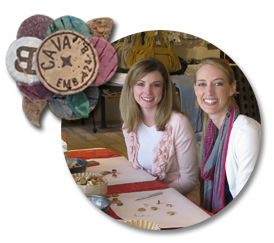 Then I slightly panicked at the thought of sitting at a child-size table surrounded by snotty-nosed preschoolers making crafts! But, fortunately, that wasn’t the case. At the big kids table, we learned to make funky jewelry out of recycled wine corks. I made a broach and a hair clip while Amanda made some fabulous shoe accessories. A good time was had by all (as captured on Kara’s blog)!
I’ve been collecting wine corks in a big vase for several years now and, after the Anthro event, felt inspired to do something creative with them. After searching for ideas on the interweb, I decided to make another bulletin board by slicing up the corks into circles.
I think my DIY bulletin board turned out pretty cute…especially considering the entire project only cost 64 cents since I already had most of the materials on hand. The only thing I bought was a bottle of kiwi green paint for the background color that peeks through between the corks. These are the supplies I used for this project:
Caution: cork crafting could easily become an addicting new hobby. Just look at all the fun project ideas I discovered!
clockwise from top: Wine Cork Ball, Wine Cork Tile, Wall of Wine Corks,
Wine Cork Bath Mat, Wine Cork Mosaic Flooring, Wine Cork Room Divider
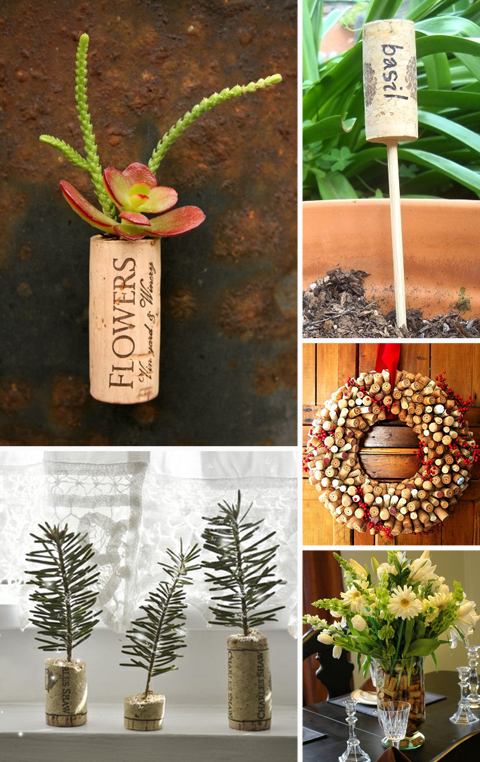 clockwise from top: Succulent Wine Cork Magnet, Wine Cork Plant Marker,
Wine Cork Wreath, Wine Cork Vase Filler, Wine Cork Trees
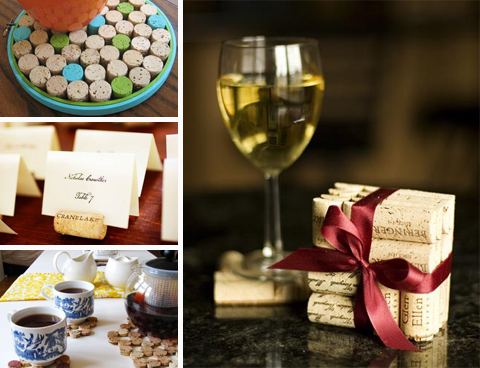 clockwise from top: Wine Cork Trivet, Wine Cork Coasters,
Wine Cork Trivet and Coaster Set, Wine Cork Place Card Holders
clockwise from top: Wine Cork Stamps, “I Love Wine” Bulletin Board,
Wine Cork Monogram, Valentine’s Wine Cork Stamps, Cork Wine Glass Charms
You can craft with a clean conscience knowing that cork is a 100% natural, renewable, recyclable and biodegradable material that is obtained through an environmentally friendly harvesting process.
Note to self: buy more wine!
While I jumped on the “go green” bandwagon long ago, each year this holiday gives me reason to stop and consider what else I could do to be a better steward of the natural resources God has entrusted us with. Around our house we already do most of the typical things – recycle, eat organic meat and produce, grow our own veggies, compost, support local farmers, and shop with reusable bags to name a few. But on the flip side, we’re not doing any favors to the ozone layer by commuting a combined 650 miles per week in our gas-guzzling vehicles. So while I’m not exactly giving No Impact Man a run for his money, there is a long list of things I can do to reduce my carbon footprint…..and hopefully make my little corner of the world a better place.
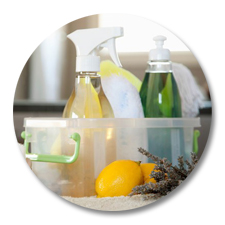
My latest experiment is replacing our off-the-shelf cleaning products with natural, non-toxic alternatives that I can make at home from a few simple ingredients. Not only are these homemade cleaners better for the environment, they are also healthier and significantly cheaper. There are many variations, but here are some common recipes for natural cleaning products:
All-purpose Cleaner
- 1/4 cup white vinegar
- 2 tbsp baking soda
- 1/4 gallon hot water
- a few drops of essential oil (optional)
Combine ingredients in a bucket, stir, then allow the mixture to cool before pouring into a spray bottle.
Glass Cleaner
- 2 tsp white vinegar
- 1/4 gallon water
- a few drops of lemon essential oil (optional)
Combine the ingredients in a spray bottle and shake. Wipe the glass surface with crumpled newspaper.
Furniture Polish
- 1/4 cup olive oil
- 4 tbsp white vinegar
- 2 tbsp lemon juice
Combine the ingredients in a spray bottle and shake well before use. Store extra in the refrigerator to prevent lemon juice from souring.
Dishwasher Soap
- Equal parts borax and washing soda
Mix the ingredients and store in a labeled container. Use the amount normally called for in your dishwasher.
Laundry Soap
- 1 cup unscented, dye-free soap (such as Ivory), grated or ground with a food processor
- 1/2 cup washing soda
- 1/2 cup borax
- a few drops of essential oil (optional)
Combine the ingredients and store in a labeled container. Use 1 tbsp for lighter loads and 2 tbsp for heavy loads.
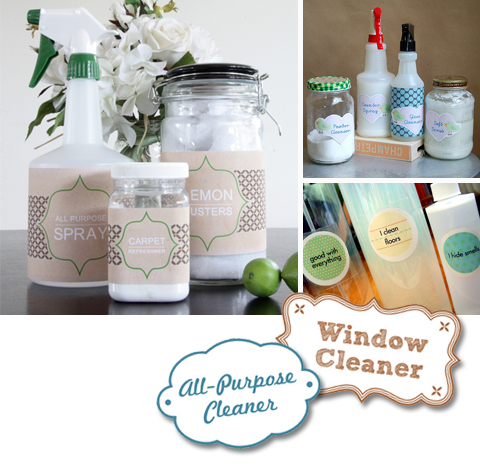 Free Printable Labels for Homemade Cleaning Products
clockwise from left: Patterned, Birdies, Dots, Shapes
So far I’ve only tried the recipes for all-purpose and glass cleaner, but found them to work just as well as the store-bought varieties. I plan to continue replacing the traditional, chemical-filled products for my natural homebrew as they run out. I’m even saving the spray bottles so I can reuse those…..after attaching a cute label, of course!
 One of our friends from work recently had a precious baby boy and we wanted to do something special for her, so Amanda and I teamed up to make dinner for the proud new parents. We were inspired by an article about putting together a “Welcome to the World” meal where each dish is given a clever, baby-themed name. We had a lot of fun concocting this menu for our sweet friend:
We also created a custom wine label to go with the “Special Delivery” theme and personalized it with some fun details, such as the baby’s birth weight and parents’ last name.
I designed these little baby labels (included below as a free download) that we printed with the name of each dish for the food containers. It’s also a good idea to include reheating instructions or any special directions on the label.
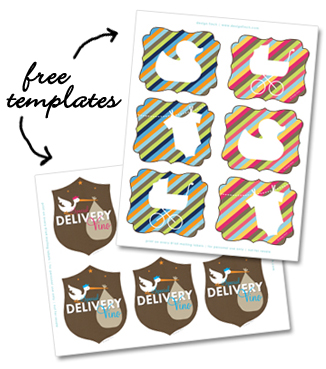 To personalize these labels for your own cooking or craft project:
These are some other helpful resources for showering new parents with meals:
It’s such a joy for me when I’m able to bless new parents with a hot, tasty meal. (Of course, my ulterior motive is getting to squeeze the new baby!) I’m always looking for new recipe ideas and would love to hear about meals you’ve gifted or received…please leave ’em in the comments!
This past weekend Jason and I joined his classmates at The Mayo Hotel for Barrister’s Ball, law school’s version of prom. The Mayo is a gorgeous historic hotel in downtown Tulsa that was recently renovated after being abandoned for 20 years. It was built in 1925 at the height of Tulsa’s oil boom and hosted many notable guests over the years, including JFK, Elvis, Babe Ruth, Bob Hope and Mae West. Designed by architect George Winkler, the 18-story hotel is typical of the Sullivanesque style of architecture because it’s terra cotta facade is organized into three parts that identify the purpose of the spaces within (or, as architect Louis Sullivan would say, “Form follows function.”).
The Mayo had already fallen into serious disrepair when the current owners (who happen to be Aggies!) purchased the building in 2001 for $250,000. Many of the original architectural elements had been stripped during a terrible renovation in the 1980’s. They initially focused on restoring just the lobby to hold events and slowly began tackling the upper floors over time. Finally, almost nine years later, the renovation project was completed to the tune of $40 million. Today the Mayo boasts 70 luxury residences, 102 boutique hotel rooms, a gorgeous ballroom on the 16th floor, a chic rooftop bar, a fancy restaurant, and my favorite coffee shop in Tulsa.
Top photo courtesy of Summit Hotels & Resorts.
Our evening at The Mayo felt like a mini vacation! The hotel room was beautifully decorated with modern furnishings and came with a great view of downtown. We sipped cocktails on the rooftop, enjoyed a candlelit dinner in the ballroom, and mingled with law school friends. I’m already looking for an excuse to plan another staycation at The Mayo!
With two knitting posts back-to-back, it may seem like I’ve just been knitting up a storm. Oh, how I wish that were the case! While I haven’t had time to cast-on many new projects lately, I finally managed to squeeze in the Loops 202 class I’d been looking forward to since completing the first class last fall. And I’m happy to report that cabling and using double pointed needles isn’t as hard as it looks!
Our first class project was the Twinkle, Twinkle Little Beanie. The pattern calls for one skein of Twinkle Soft Chunky yarn (the same yarn I used for the Snowmageddon scarf), but because my local yarn store was sold out of Twinkle I used Malabrigo Rasta (in the Arco Iris color) instead. Malabrigo is a delicious yarn to knit with because of its soft, squishy texture, however the yellow vintage button on the flap is my favorite detail of this hat. Sadly, its a little too snug for my noggin….but I guess that’s a good excuse to give this one away and make another one for myself!
Next, we knitted a pair of Tangle Fingerless Mittens to learn the cabling technique. I chose hand-dyed Plymouth Baby Alpaca Grande yarn for this project, although in hindsight I think a solid color would make the cable more visible. Anyway, I must say that while cabling is fun, I am not in love with this pattern. It required way too much concentration for my liking plus, when its all said and done, you are still left with cold fingers. I’ve never really understood the purpose of fingerless mittens.
Now that the class if finished and I’m feeling a little more confident in my knitting abilities, I plan to give felting a whirl. This weekend I purchased the supplies to make a pair of felted slippers and am anxious to get started!